|
Oh my this may be my most favorite project we've done yet. I love when you vision actually works out just how you want!
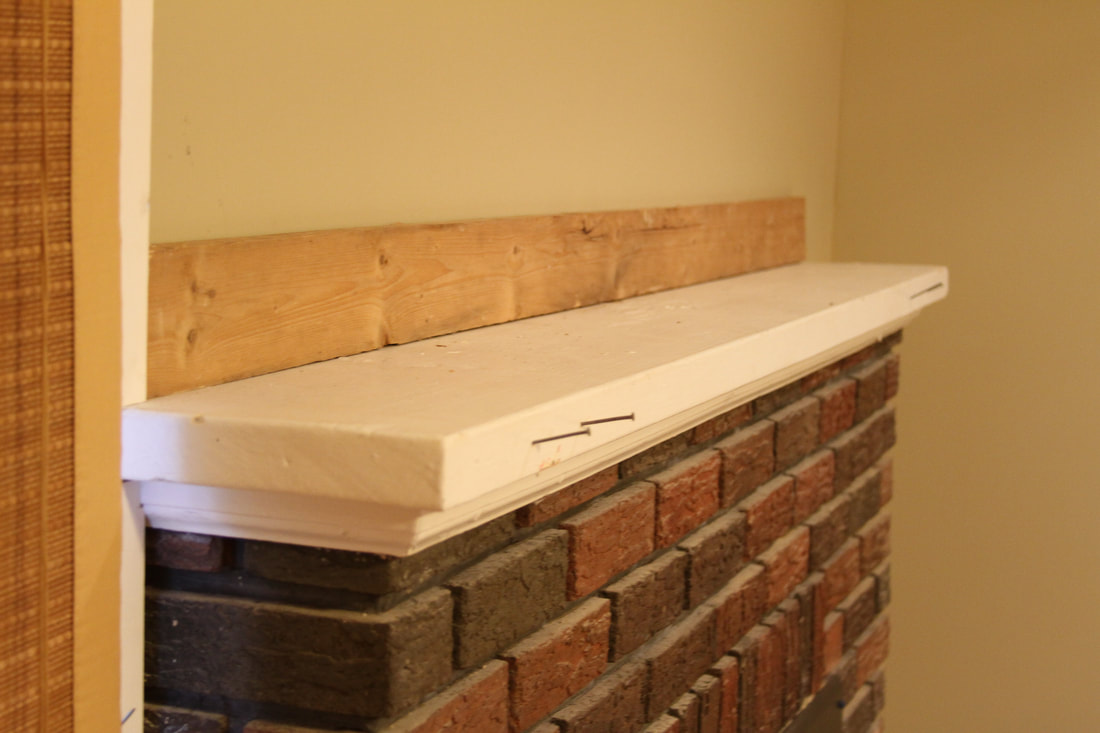
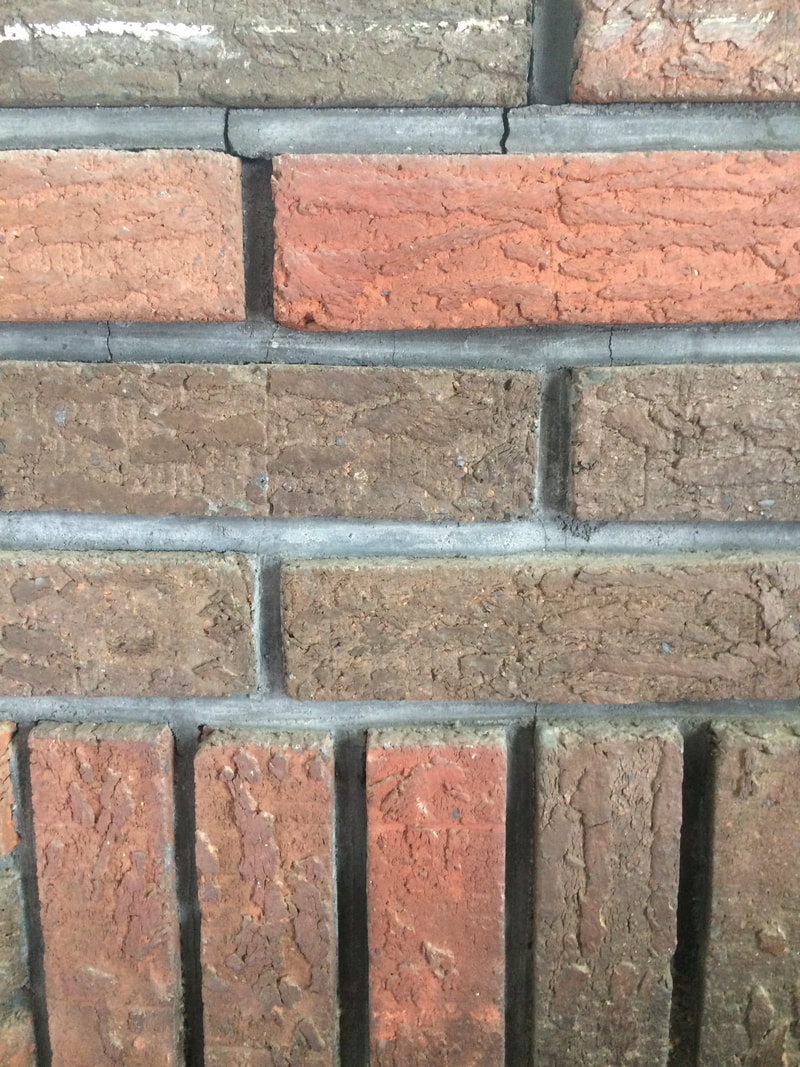
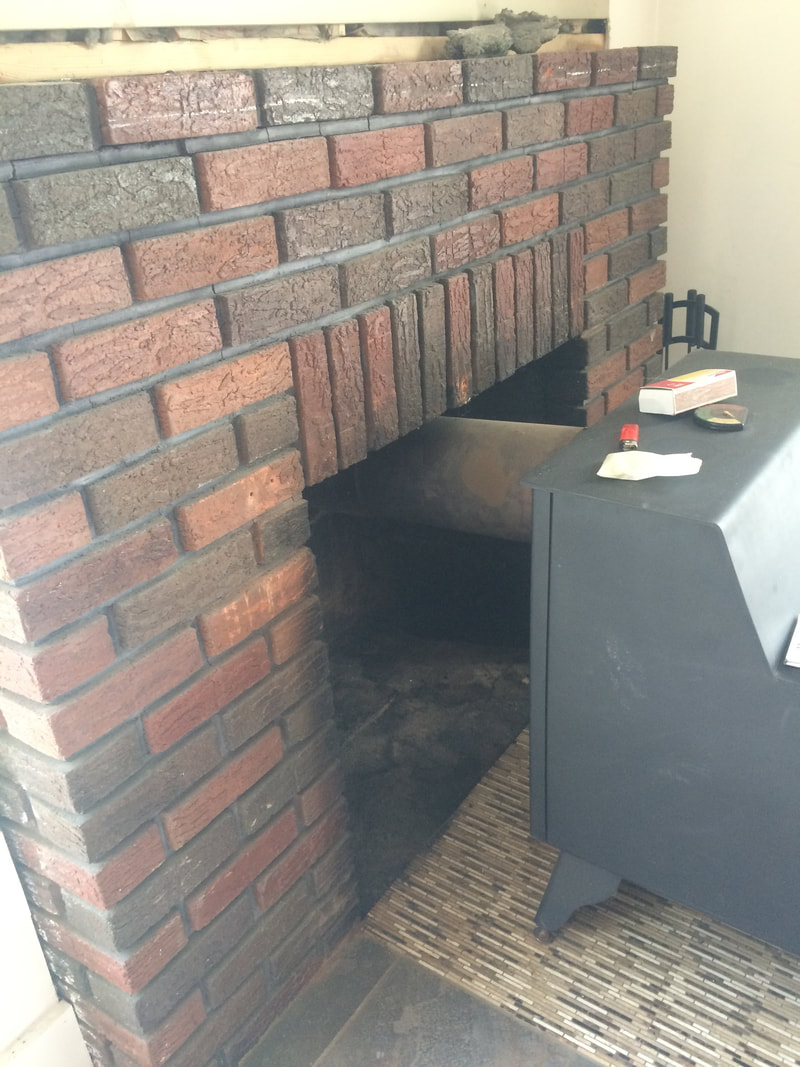
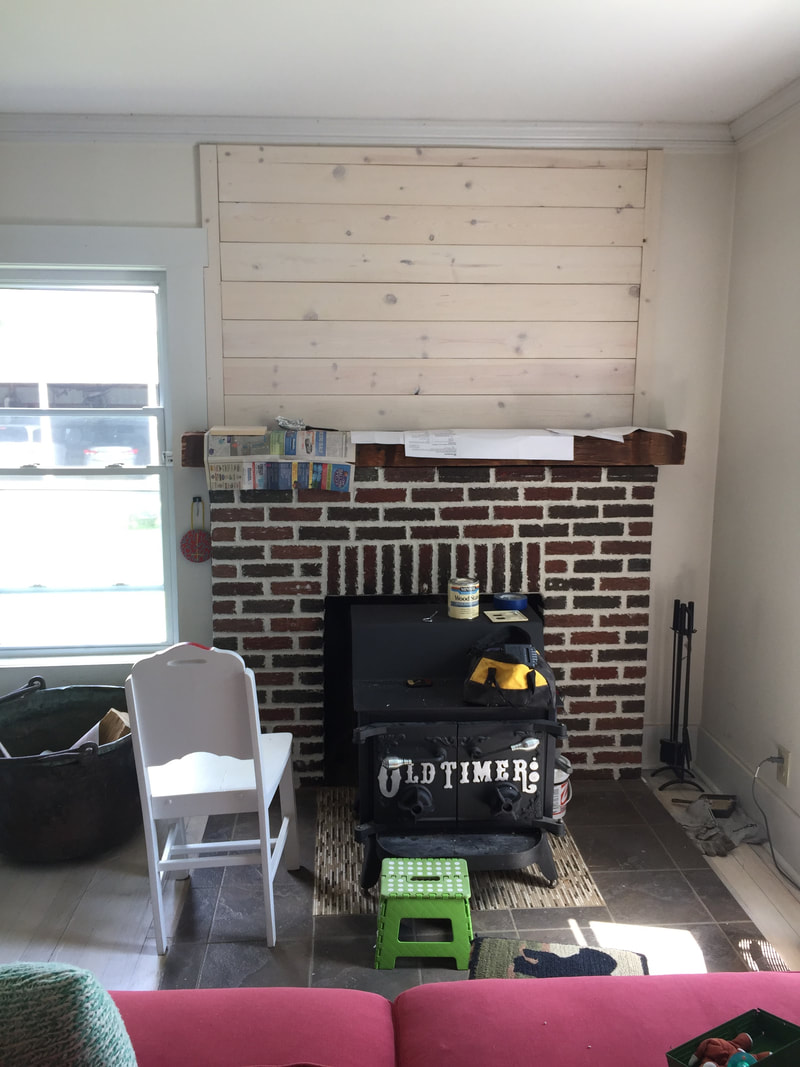
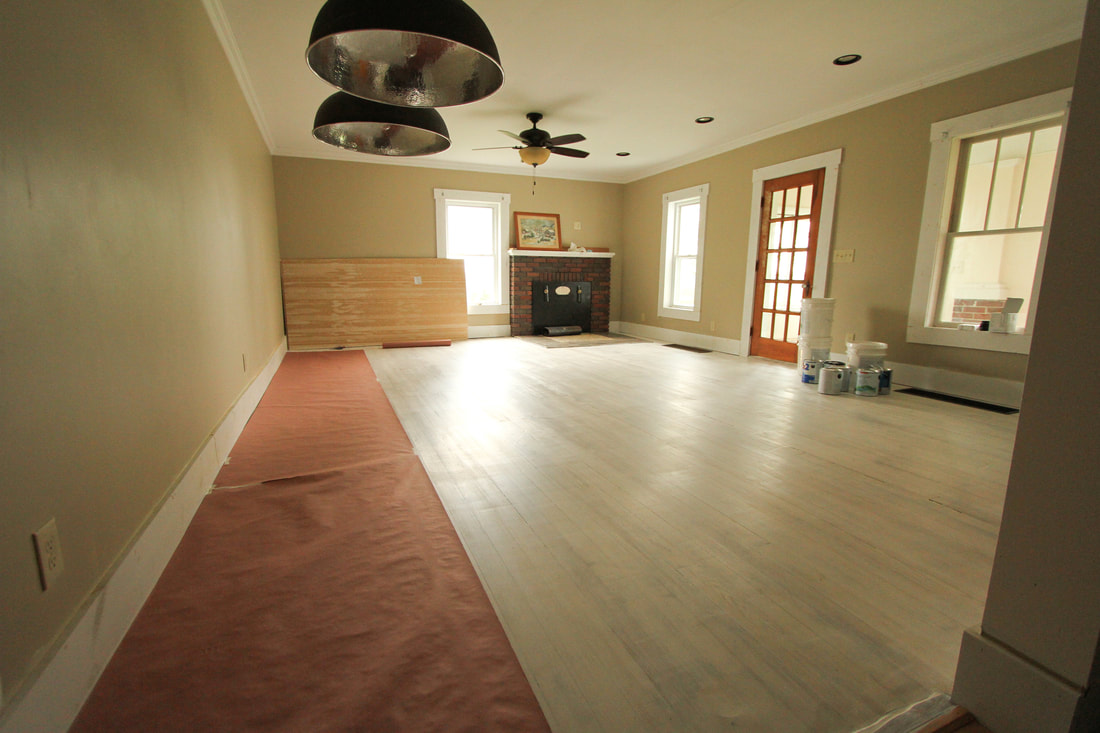 I never was a huge fan of our fireplace, which was a shame, because a real wood burning fireplace was a must have on our list when we bought the house. The brick and mantel just looked cheap and it didn't have that old home feel, but it was a working fireplace so we figured someday we could fix it up to our liking. The mortar was grey and didn't come to the edge of the bricks, which meant spiders and dust filled the gaps. The mantel was just a white board with nails poking out and a 2x4 covering up a hole in the drywall.
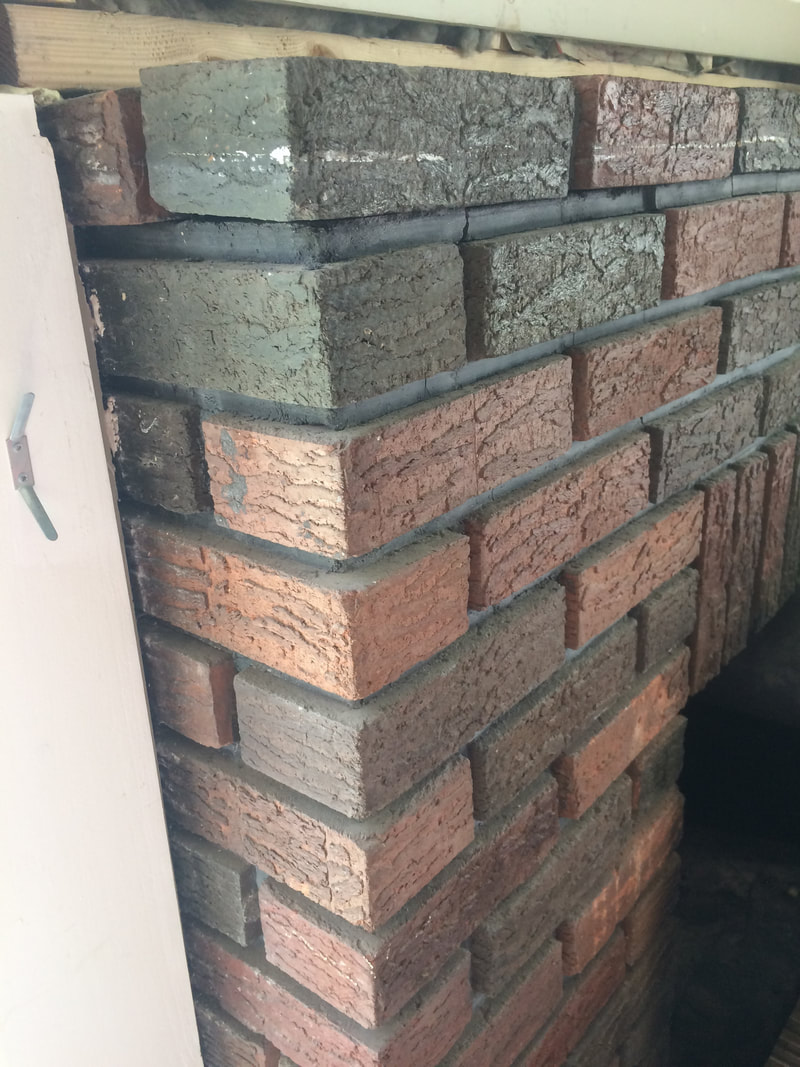
I love red brick with white mortar, and our brick, although cheap looking was the right color. Originally I thought it was one of those fake brick sheet things, but when Danny took the mantel down I found out the mantel was actually made of real bricks, and the top row was completely loose! 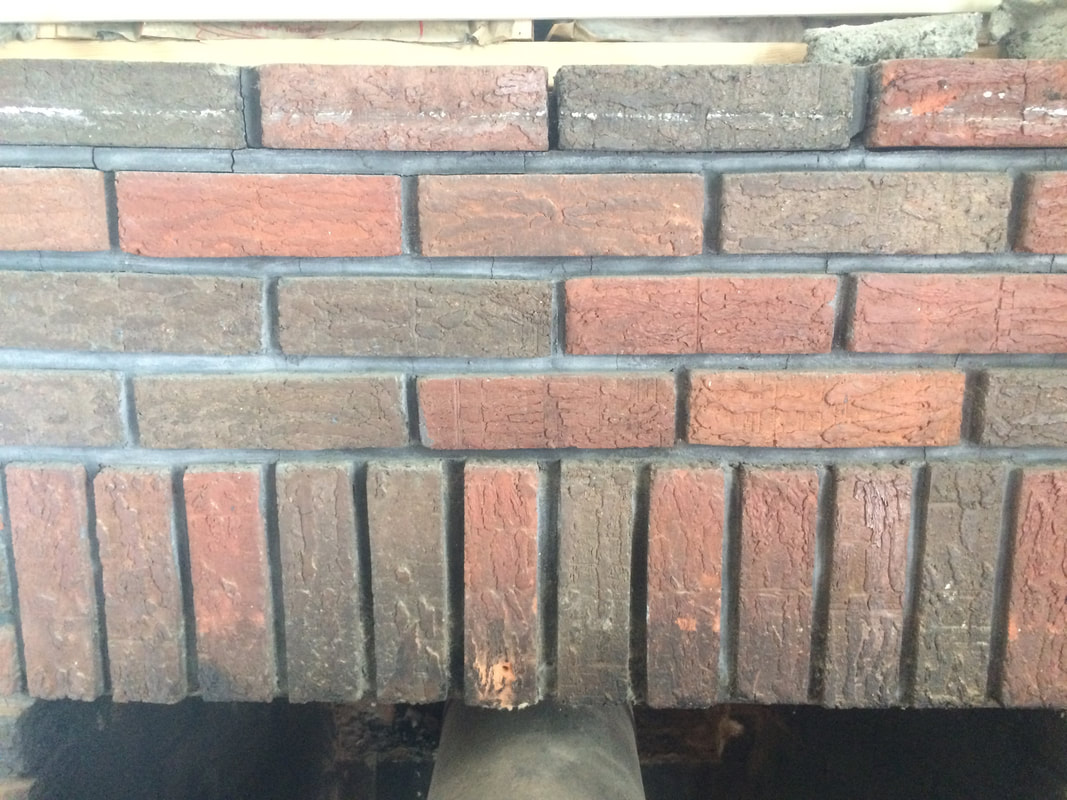 I had this idea to try to re-mortar the brick and just simply cover up the old, gray mortar. I knew I wanted it white and messy, the cleanest acceptable look was the butter joint look, but I also loved the german smear look. I decided to take the risk and if it didn't turn out I'd just paint the mortar and brick all white.
This project kind of became my baby. I knew exactly the look I wanted, researched it to death, and made sure I really had made my decision, and then told Danny I wanted to do it.
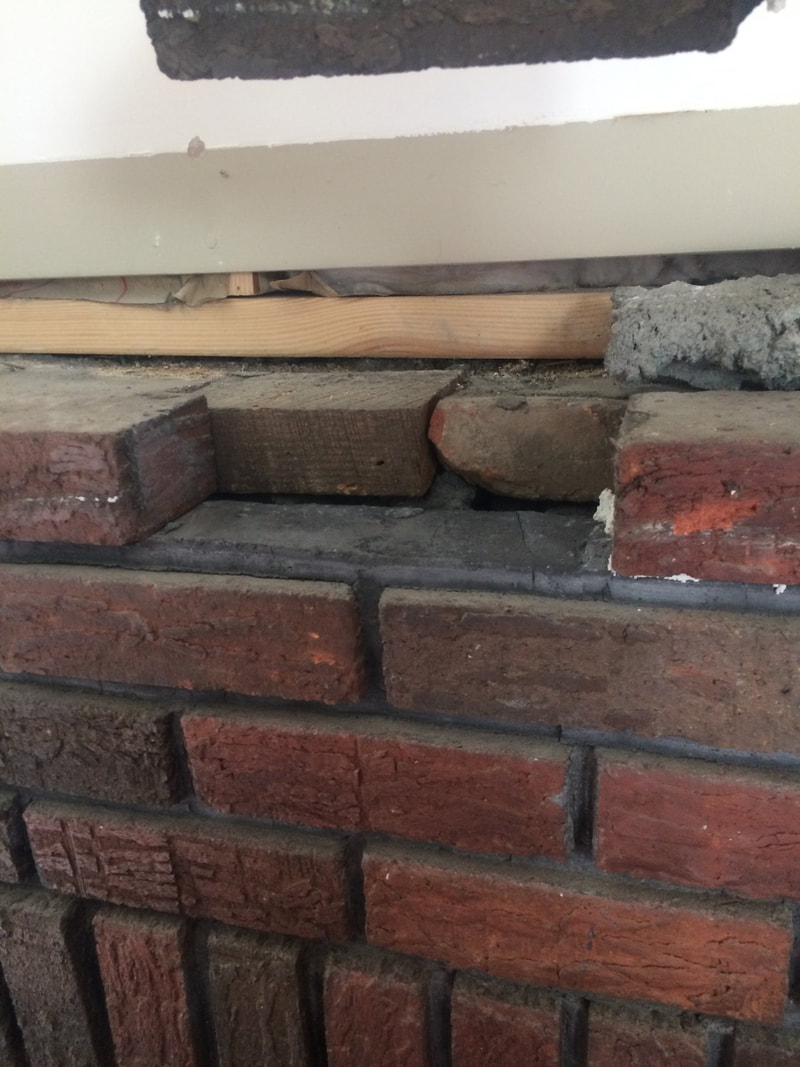
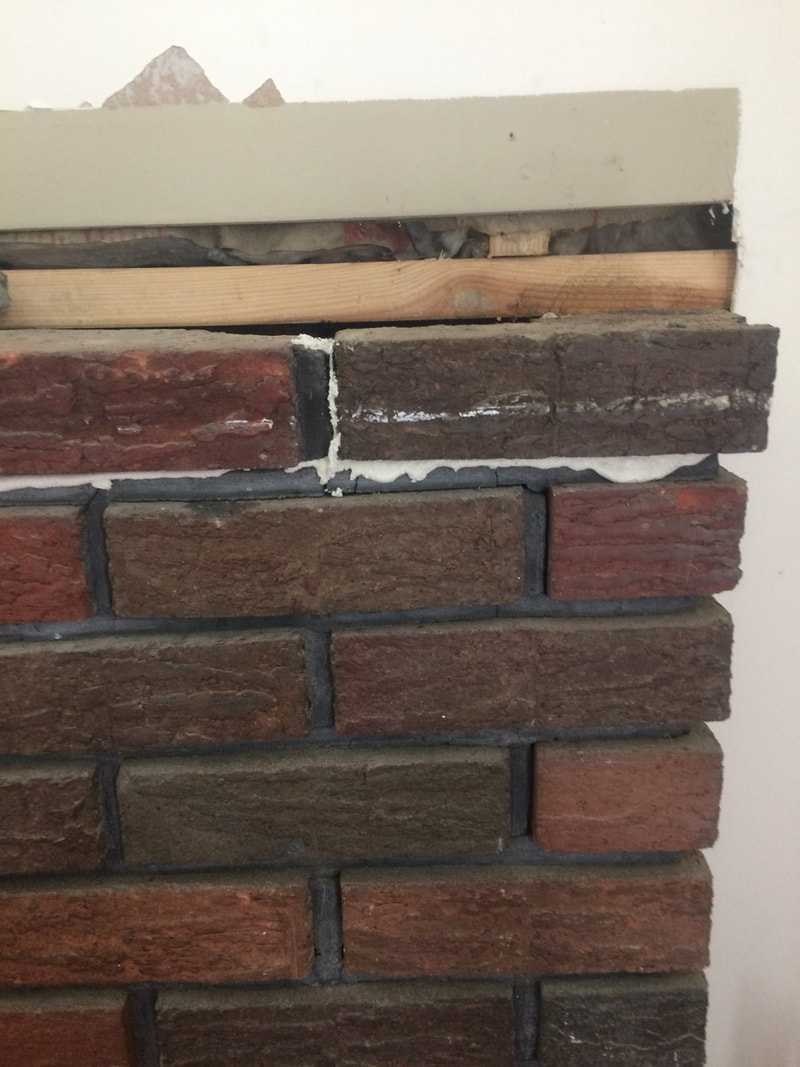
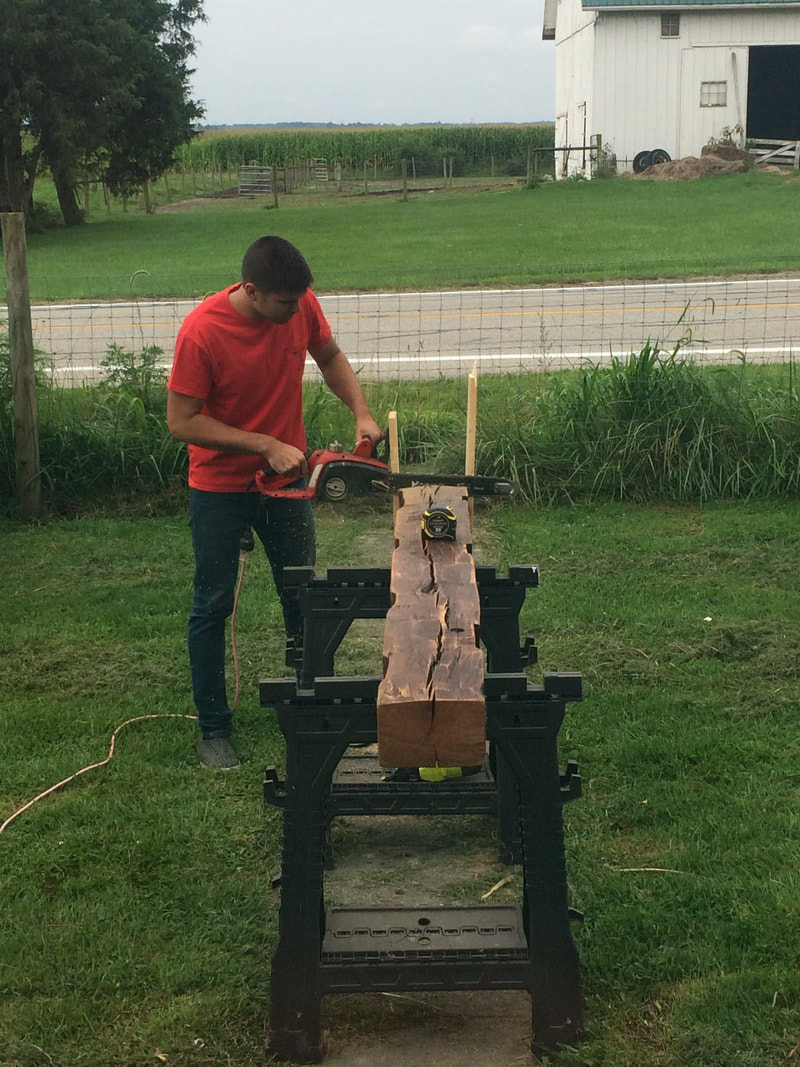
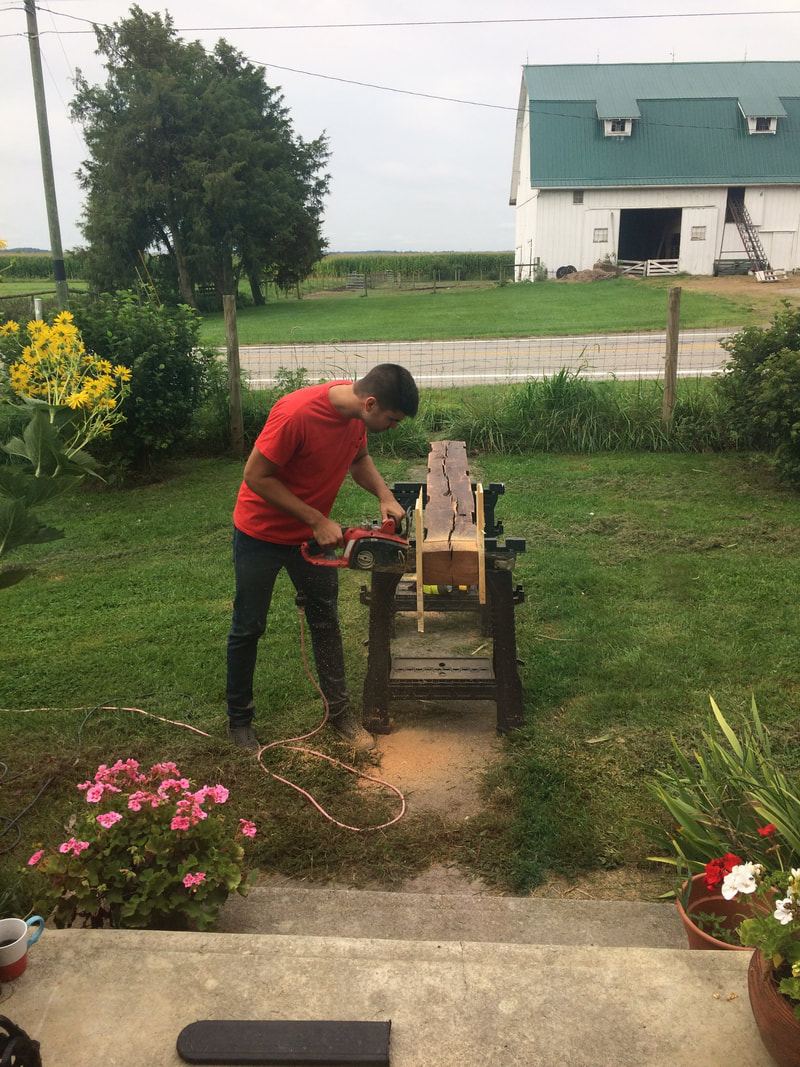
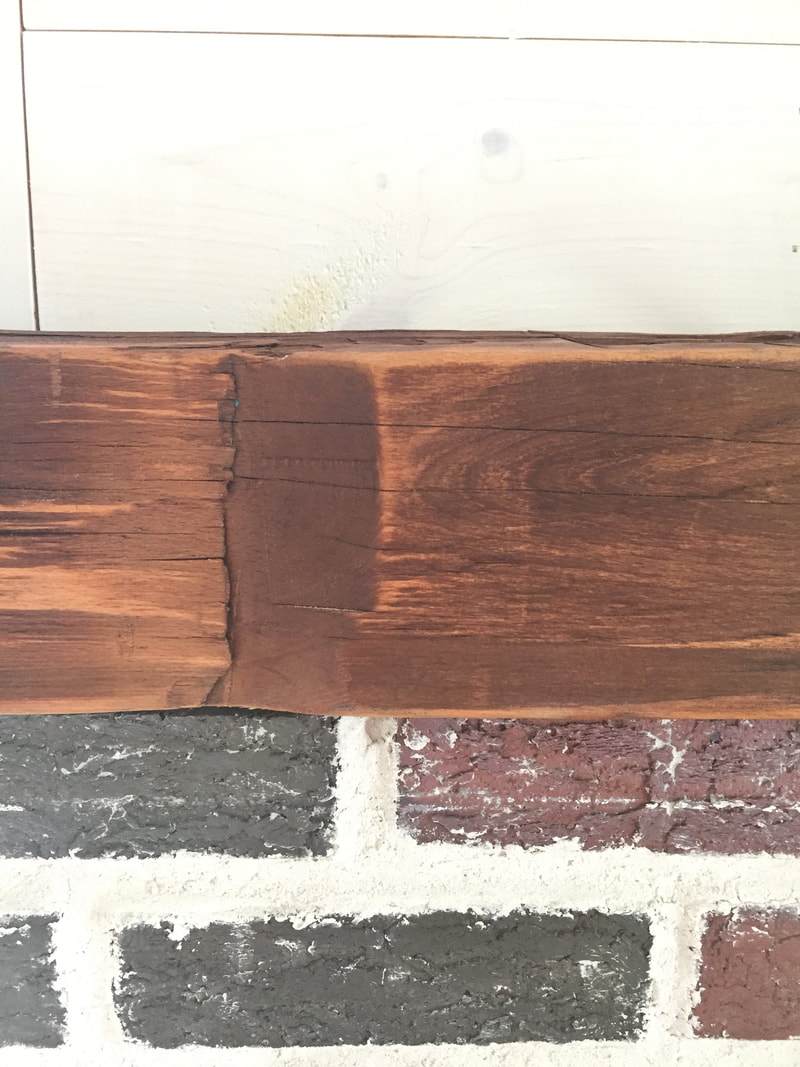
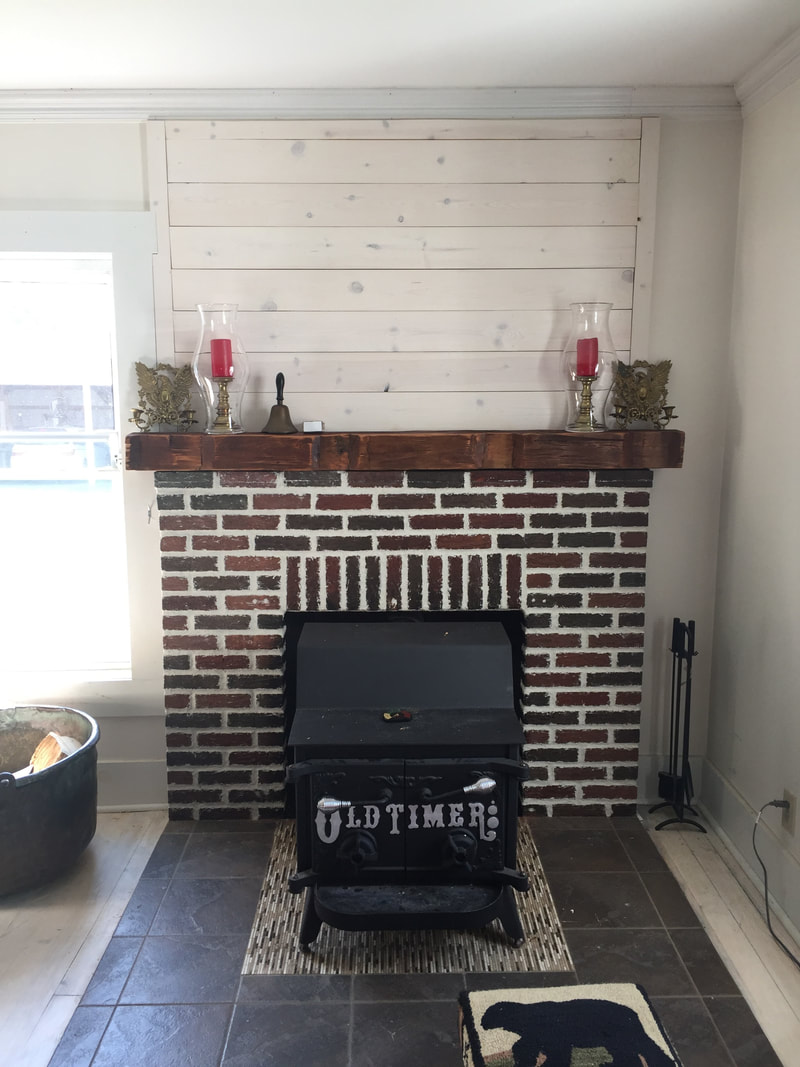
I couldn't find anywhere online where someone just grouted over for cosmetic reasons, so I went out on a limb and decided to just try it. I pulled up my favorite blog post I found of a fireplace with a similar look, ordered my mortar, brush, piping bag, and trowel from Lowe's and set to work. I had to reset the entire top row since it was loose, crossing my fingers in hopes that I could figure out how to set brick. Halfway through the project, I ran out of mortar, being that the gaps in the bricks were much deeper than I thought. But, it was looking good. Unfortunately, the next morning all the mortar had cracked. Almost every spot I had spread the mortar had cracking all through. While it didn't look horrible, it wasn't what I wanted and I felt it looked very DIY. Of course in my frustration, I forgot to snap a fail photo. The day I worked became very humid so for the second round I waited for some cool days of low humidity in the forecast. I filled all the cracks from the first round of mortar and then finished up the areas where I had run out. The cooler weather did the trick and now the mortar was strong and smooth. Of the new areas I filled, there was some mild cracking, but I went back in and just lightly covered the cracks with more mortar and that did the trick. All in all, it took 4 different days for mortaring, had I had enough I could have done it in 3. The vertical bricks had to be done in layers because the mortar would gloop if I filled it too much. 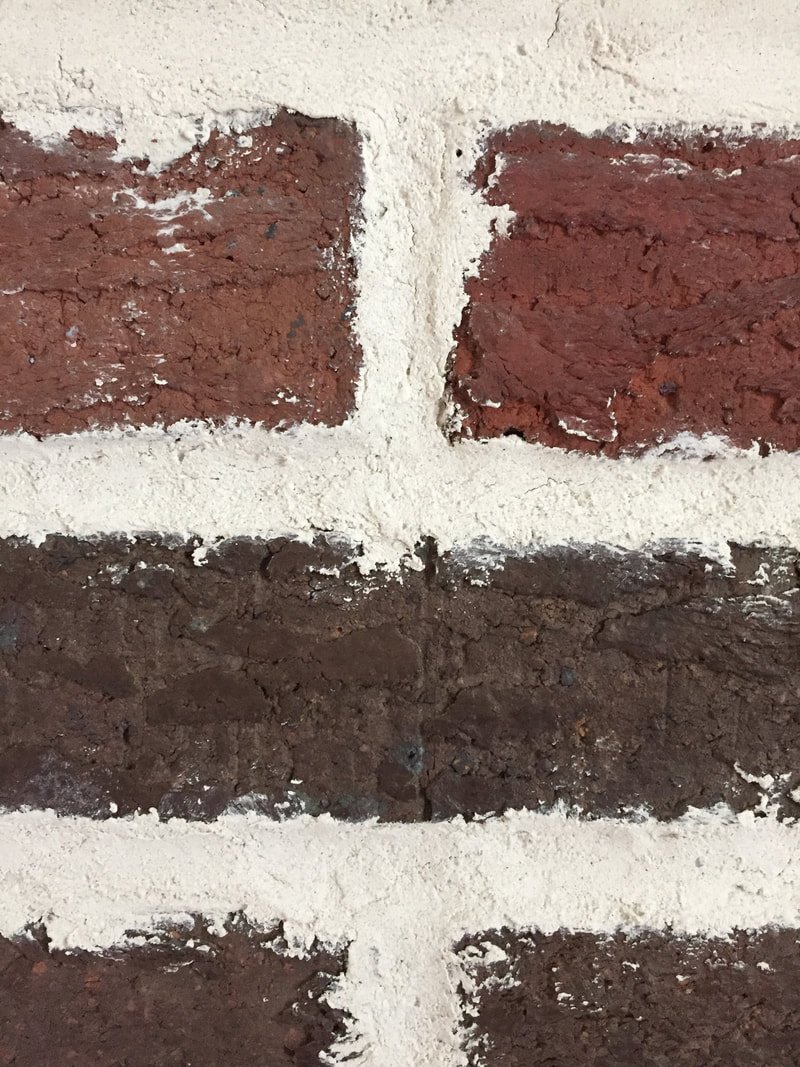 I wasn't sure how I felt until I saw it finished, but I love it! I thought I'd go back and brush some mortar on the face of the bricks, but I tested the view for a few days and decided it was perfect. The mortaring was my project, but the the mantel was Danny's, so he took over getting the beam installed. The old beam was a Christmas gift from my parents and was exactly what we wanted. Danny had to trim down the edges a bit using his chainsaw which made me nervous, but he did a great job.
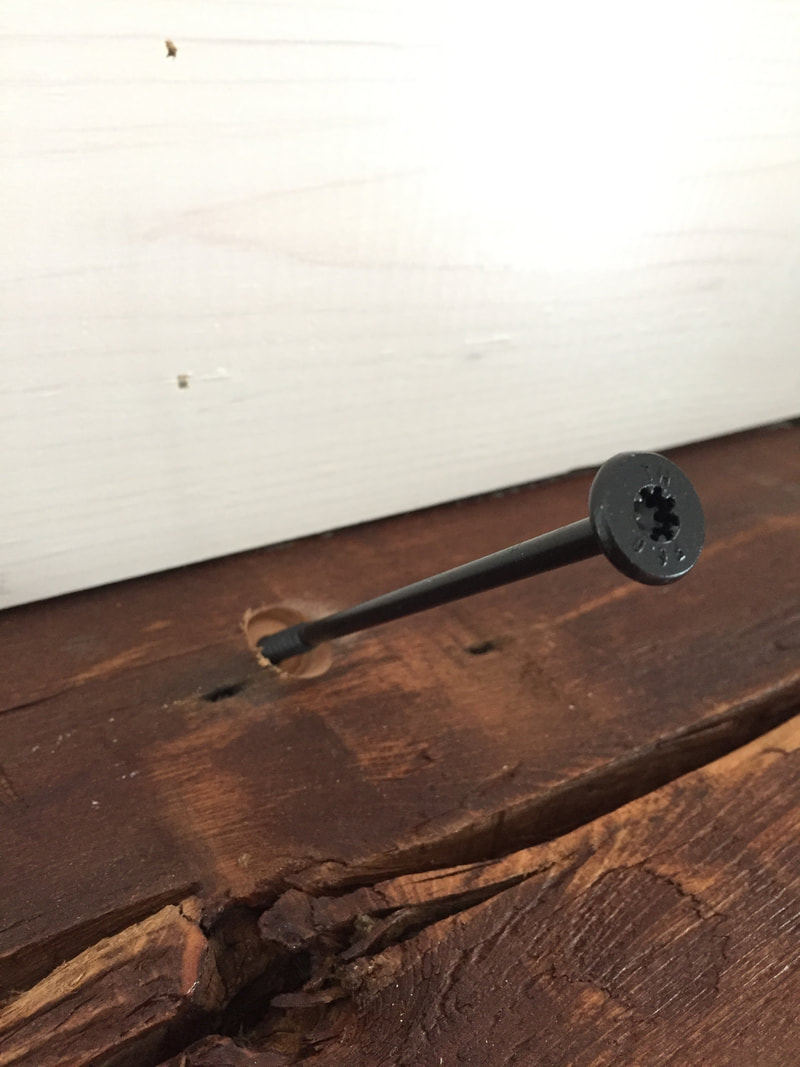
He secured it with some structural wood screws and I went back in and filled the gaps between the beam and brick with our leftover mortar, which of course I ran out. When it's in the budget, we'll purchase a third tub of mortar to finish it off. It's one of those things that we only really notice, but it is just that final step to make it look perfectly complete.
My mom suggested finishing it off by doing shiplap up to the ceiling to unify the fireplace and wall. We decided we liked that idea. Danny cut some pine boards to size, nailed them up, and whitewashed them all in a day. I honestly can't believe it is the same fireplace!
I just love how it turned out and we can't wait to get some fires roaring in the fireplace! 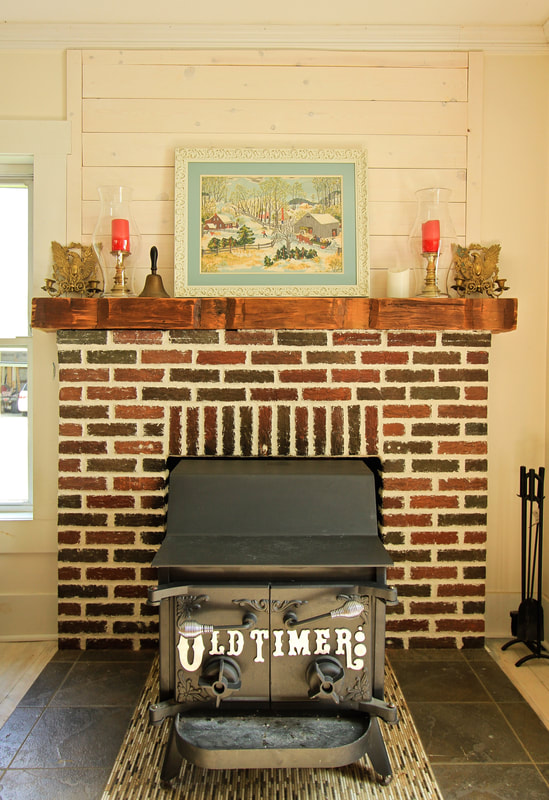  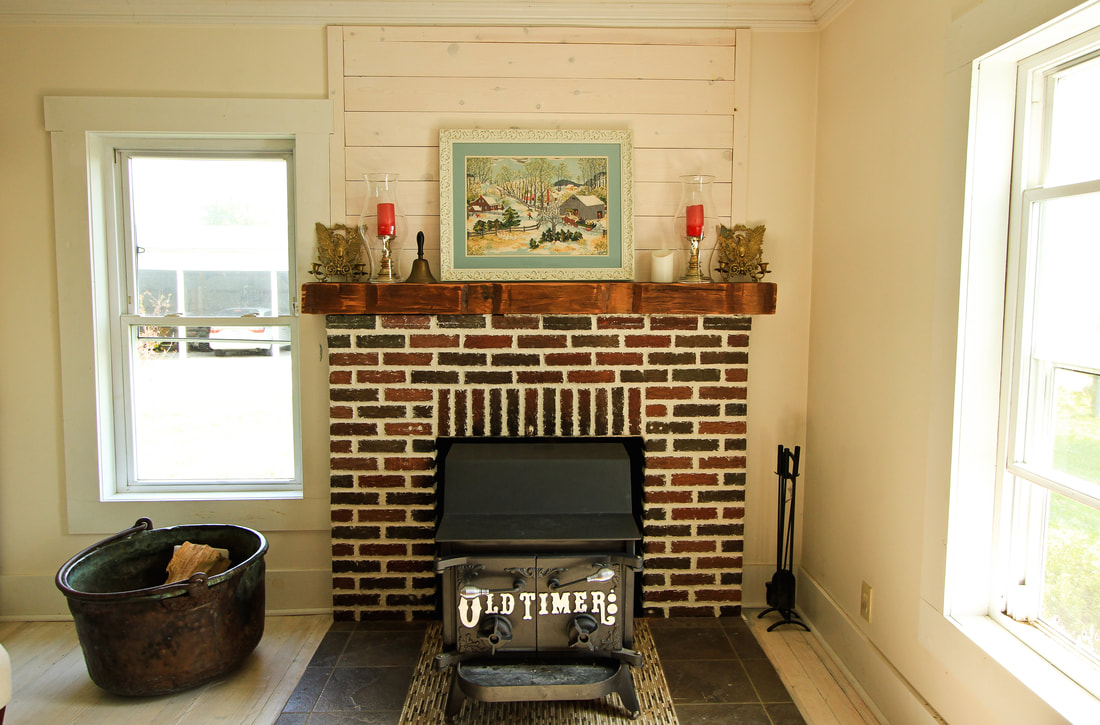 The picture will be hung, but we didn't have the right anchors and I was too excited to wait to share.
0 Comments
Your comment will be posted after it is approved.
Leave a Reply. |
About The KelleysThe Choosing Home PodcastCategories
All
Archives
September 2022
|


 RSS Feed
